| IT Feature


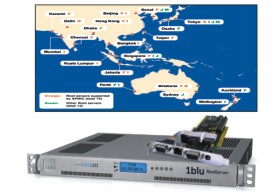
 Root server is a special purpose server that is used to deal with requests send by other DNS servers. Usually, when you type an URL and press enter your computer instantly contact with DNS server to convert the URL into machine-readable IP address. A DNS server maintains a database of websites. When any particular request not matches with its stored information it send a request to the nearest root server. At this moment 13 root servers are available today in different places of this world. Surprisingly, all root servers maintain same information. Compare to the general DNS server a root server hold vast information regarding websites. It does not host the website but all root servers know the exact location of any particular page. Recently Bangladesh installed a root server named "root server F" in the city. Sustainable Development Networking Program (SDNP) with others national and internationals organizations share the entire cost to install this cutting edge technology. SDNP already gave connection to several ISPs including BTTB and they expanding this facility day-by-day. Root sever ensures proper utilisation of submarine cable by obstructing local traffic to go to outside this region. Root server is a special purpose server that is used to deal with requests send by other DNS servers. Usually, when you type an URL and press enter your computer instantly contact with DNS server to convert the URL into machine-readable IP address. A DNS server maintains a database of websites. When any particular request not matches with its stored information it send a request to the nearest root server. At this moment 13 root servers are available today in different places of this world. Surprisingly, all root servers maintain same information. Compare to the general DNS server a root server hold vast information regarding websites. It does not host the website but all root servers know the exact location of any particular page. Recently Bangladesh installed a root server named "root server F" in the city. Sustainable Development Networking Program (SDNP) with others national and internationals organizations share the entire cost to install this cutting edge technology. SDNP already gave connection to several ISPs including BTTB and they expanding this facility day-by-day. Root sever ensures proper utilisation of submarine cable by obstructing local traffic to go to outside this region.
 IT Tips IT Tips
Safe from ad-aware
By default, ad-aware stores log files containing information about malware scans at the following location:
C:\Documents and Settings\[YOUR_USER_NAME]
\Application Data\Lavasoft\Ad-Aware\Logs
If you would rather save these files to another location, do the following:
1. Click the button that looks like a gear ("Settings").
2. When the settings dialog opens, click the "General" button.
3. Underneath "Write logfiles to" click on the folder button.
4. A "Browse for Folder" dialog box will appear. Navigate your hard drive(s) and click the desired folder.
5. Click "OK" once you have selected your desired folder.
6. Click "Proceed" to save your settings.
Explorer shortcuts
F2: Rename object
F3: Find all files
ALT+ENTER: Open the properties for the selected object
SHIFT+DELETE: Delete selection immediately, without moving the item to the Recycle Bin
Compiled By
Edward Apurba Singha
Computer Engineer

Websites:
www.newapapers.com
www.egreetings.com
www.cartoon.com
Copyright
(R) thedailystar.net 2007 |
